Insulated Siding Installation Cost
Insulated siding installation cost is a significant consideration for homeowners looking to improve energy efficiency and curb appeal. This cost varies widely depending on several factors, including the type of siding chosen, the size and complexity of the home, regional labor rates, and the cost of materials. Understanding these variables is crucial for budgeting and planning your project effectively. This guide will break down the various components of the cost, helping you navigate the process and make informed decisions.
From the initial consultation to the final touches, we’ll explore everything that impacts the overall expense. We’ll compare different siding materials, analyze labor costs, and provide insights into potential cost-saving measures. Whether you’re planning a complete home renovation or a smaller project, this information will empower you to make the best choices for your home and budget.


Factors Influencing Insulated Siding Installation Cost
Several key factors significantly impact the total cost of insulated siding installation. Understanding these elements allows for more accurate budgeting and realistic expectations during a home renovation project. These factors encompass material choices, labor requirements, regional pricing variations, and the specific characteristics of the house itself.
Labor Costs
Labor costs represent a substantial portion of the overall expense. The hourly rate for skilled installers varies geographically and depends on factors such as experience and demand. Larger, more complex projects naturally require more labor hours, increasing the overall cost. For instance, a two-story home with intricate architectural details will demand more time and expertise than a single-story ranch-style home, leading to higher labor charges. The complexity of the installation, such as the need for specialized tools or techniques, also influences the labor costs.
Material Costs
Material costs vary considerably depending on the type of insulated siding chosen. Vinyl siding, generally the most affordable option, offers a lower initial investment. However, fiber cement siding, while more expensive upfront, boasts superior durability and longevity, potentially offsetting the higher initial cost over the siding’s lifespan. Metal siding presents another alternative, with prices varying depending on the chosen metal (e.g., aluminum, steel) and its finish. The quantity of materials needed, dictated by the home’s size and the amount of siding required, also significantly affects the overall material cost. Choosing higher-end materials, such as those with enhanced insulation properties or specialized finishes, will also increase the overall material cost.
Regional Variations
Regional differences in labor rates and material availability heavily influence the final cost. Areas with a higher cost of living generally have higher labor rates, resulting in increased installation expenses. Transportation costs for materials can also vary depending on location and distance from suppliers. Furthermore, local building codes and regulations might necessitate additional steps or specialized materials, leading to higher costs in certain regions. For example, areas prone to hurricanes or extreme weather conditions might require more robust siding materials, adding to the overall expense.
Impact of Home Size and Complexity
The size and complexity of the home directly impact the installation cost. Larger homes require more materials and labor, leading to higher overall expenses. Homes with complex architectural features, such as multiple gables, dormers, or intricate trim work, increase installation time and labor costs due to the increased precision and attention to detail required. For instance, a multi-level home with numerous angles and projections will require significantly more time and effort to install siding correctly compared to a simple, rectangular home.
Cost Breakdown for a Typical Installation Project
The following table provides a cost breakdown for a typical insulated siding installation project. Note that these figures are estimates and can vary based on the factors discussed above.
| Item | Cost per Square Foot | Area (sq ft) | Total Cost |
|---|---|---|---|
| Materials (Vinyl Siding) | $3 – $6 | 1500 | $4500 – $9000 |
| Labor | $3 – $5 | 1500 | $4500 – $7500 |
| Permits | Variable | – | $300 – $1000 |
| Total Estimated Cost | – | – | $9300 – $17500 |
Labor Costs Associated with Insulated Siding Installation
Labor costs represent a significant portion of the overall expense when installing insulated siding. Understanding these costs, which vary widely depending on several factors, is crucial for accurate budgeting and project planning. This section will detail the components of labor costs, providing a clearer picture of what to expect.
Hourly rates for skilled siding installers fluctuate significantly across different regions of the country, influenced by factors such as local market demand, cost of living, and unionization. Generally, experienced installers command higher rates than less experienced ones. The complexity of the project also plays a crucial role, with intricate designs or challenging installations requiring more time and specialized skills, thus increasing labor costs.
Hourly Rates and Regional Variations
While precise hourly rates are difficult to pinpoint without specific location and project details, a reasonable range can be estimated. In less expensive areas, an installer might charge between $30 and $50 per hour. However, in major metropolitan areas or regions with a high cost of living and strong union presence, hourly rates could easily climb to $60 to $100 or even more per hour for highly specialized installers. These are just estimates, and obtaining quotes from multiple local contractors is essential for accurate pricing.
Factors Influencing Total Labor Costs
- Project Size: Larger projects naturally require more labor hours, directly increasing the total cost. A small house might take a few days, while a large commercial building could take weeks or even months.
- Project Complexity: Intricate designs, difficult-to-access areas (such as multiple stories or steep roofs), and the need for specialized tools or techniques all add to the labor time and thus the cost. For example, installing siding around complex architectural features or removing and reinstalling existing siding adds significant time and expense.
- Required Expertise: Certain installation methods require more specialized skills, leading to higher labor costs. Working with specific materials, like fiber cement or high-end composite siding, might demand more experience and precision, translating to higher hourly rates.
- Material Handling and Disposal: The cost of labor also includes the time spent handling the siding materials, preparing the worksite, and properly disposing of waste materials. This often goes beyond the actual installation itself.
- Permits and Inspections: In some areas, obtaining permits and scheduling inspections can add to the overall project timeline and thus the labor costs. This is especially true for larger or more complex projects.
Comparison of Labor Costs for Different Installation Methods
Different installation methods have varying labor requirements. For instance, installing insulated vinyl siding is generally faster and less labor-intensive than installing more complex systems like fiber cement or engineered wood siding. The use of specialized tools and techniques, such as using a nail gun versus nailing each piece by hand, also significantly impacts the labor hours required. The choice of installation method will be a major determinant of the final labor cost.
Labor-Related Expenses
- Installer wages (hourly or per-project rate)
- Travel time to and from the job site
- Crew size and supervision
- Insurance and workers’ compensation costs (borne by the contractor)
- Tool and equipment rental or ownership costs
- Waste disposal fees
Material Costs for Insulated Siding Installation
The cost of insulated siding installation is significantly impacted by the materials chosen. Different materials offer varying levels of insulation, durability, and aesthetic appeal, leading to a wide range of price points. Understanding these variations is crucial for budgeting your project accurately. This section will detail the price fluctuations among different materials, influencing factors, and the costs of supplementary materials.
Insulated Siding Material Price Variations
Several factors contribute to the price differences between various insulated siding materials. These include the raw materials used in manufacturing, the manufacturing process itself, the brand reputation, and the supplier’s pricing strategies. Higher-quality materials generally offer better insulation, durability, and longevity, justifying their higher cost. Established brands often command premium prices due to their reputation and perceived quality. Finally, supplier pricing can fluctuate based on market conditions and regional availability.
Factors Influencing Material Costs
Material quality directly affects the price. For instance, siding made with thicker foam insulation will generally cost more than thinner options, but it will also provide superior thermal performance. Brand recognition plays a significant role; well-known brands often charge a premium for their name and associated warranties. The supplier also influences cost. Local suppliers might offer competitive pricing, while national distributors may have higher overhead costs reflected in their prices. Finally, the quantity of materials needed will affect the overall cost. Larger projects naturally require more material, resulting in a higher total expenditure.
Comparison of Insulated Siding Materials
The following table compares common insulated siding materials, showing their approximate cost per square foot and typical lifespan. Remember that these are estimates, and actual costs can vary depending on location, supplier, and project specifics.
| Material | Cost per Square Foot (USD) | Lifespan (Years) | Notes |
|---|---|---|---|
| Vinyl Insulated Siding | $3 – $8 | 20-40 | Widely available, relatively inexpensive, low maintenance. |
| Fiber Cement Insulated Siding | $7 – $15 | 50-75 | Durable, fire-resistant, requires more maintenance than vinyl. |
| Aluminum Insulated Siding | $8 – $15 | 30-50 | Lightweight, durable, but can dent. |
| Wood Insulated Siding | $10 – $25+ | 30-50+ | Aesthetically pleasing, requires regular maintenance and painting. |
Costs of Additional Materials
Beyond the primary siding panels, several additional materials are necessary for a complete installation. These include trim pieces (for corners, windows, and doors), fasteners (nails or screws specifically designed for the chosen siding), and underlayment (a waterproof membrane installed beneath the siding to protect the house from moisture). The cost of these supplementary materials can add up, typically ranging from $1 to $5 per square foot, depending on the choices made and the complexity of the project. For example, using high-end, decorative trim will significantly increase the overall material cost compared to using basic, functional trim. Similarly, the choice of fasteners, while seemingly minor, can influence both the installation process and the longevity of the siding. A quality underlayment is crucial for preventing water damage and protecting the home’s structure. Ignoring this aspect can lead to costly repairs down the line.
The Installation Process
Insulated siding installation is a multi-step process requiring precision and attention to detail. A successful installation ensures both the aesthetic appeal and the energy efficiency of your home. Proper preparation and adherence to best practices are crucial for a long-lasting, cost-effective result. This step-by-step guide will walk you through the process, highlighting key considerations at each stage.
The installation process generally involves several key stages, from initial preparation to final finishing. Each stage is critical to the overall success of the project and contributes to the final cost. While variations exist depending on the specific siding type and house design, the fundamental steps remain consistent.
Surface Preparation
Before any siding goes up, thorough preparation of the existing wall surface is paramount. This stage sets the foundation for a secure and lasting installation. Neglecting this step can lead to problems later on, increasing costs and potentially compromising the integrity of the siding.
- Removing Old Siding: Carefully remove any existing siding, ensuring all nails and fasteners are extracted. This typically involves using pry bars and hammers, and may require additional labor if the old siding is particularly stubborn or difficult to remove. Cost: $100 – $500 depending on the size of the wall and the type of old siding.
- Repairing Damaged Areas: Repair any damage to the underlying sheathing, such as rotted wood or cracks. This may involve replacing sections of sheathing or applying patching compounds. Cost: $50 – $300 depending on the extent of the damage.
- Cleaning the Surface: Thoroughly clean the surface of the wall, removing any dirt, debris, or loose materials. A pressure washer is often used for this step, ensuring a clean, even surface for the new siding. Cost: $50 – $150 for equipment rental or professional cleaning.
Framing and Installation of Furring Strips (If Necessary)
Depending on the existing wall structure and the type of insulated siding being installed, furring strips may be necessary to create a consistent and level surface. This step helps to ensure proper spacing and alignment of the siding panels, contributing to a professional-looking finish.
- Measuring and Cutting: Accurately measure and cut the furring strips to the appropriate length. This requires precise measurements to ensure proper alignment and spacing. Cost: $20 – $50 for materials.
- Attaching Furring Strips: Securely attach the furring strips to the wall using appropriate fasteners. This step requires careful placement to maintain consistent spacing and a level surface. Cost: Included in labor costs.
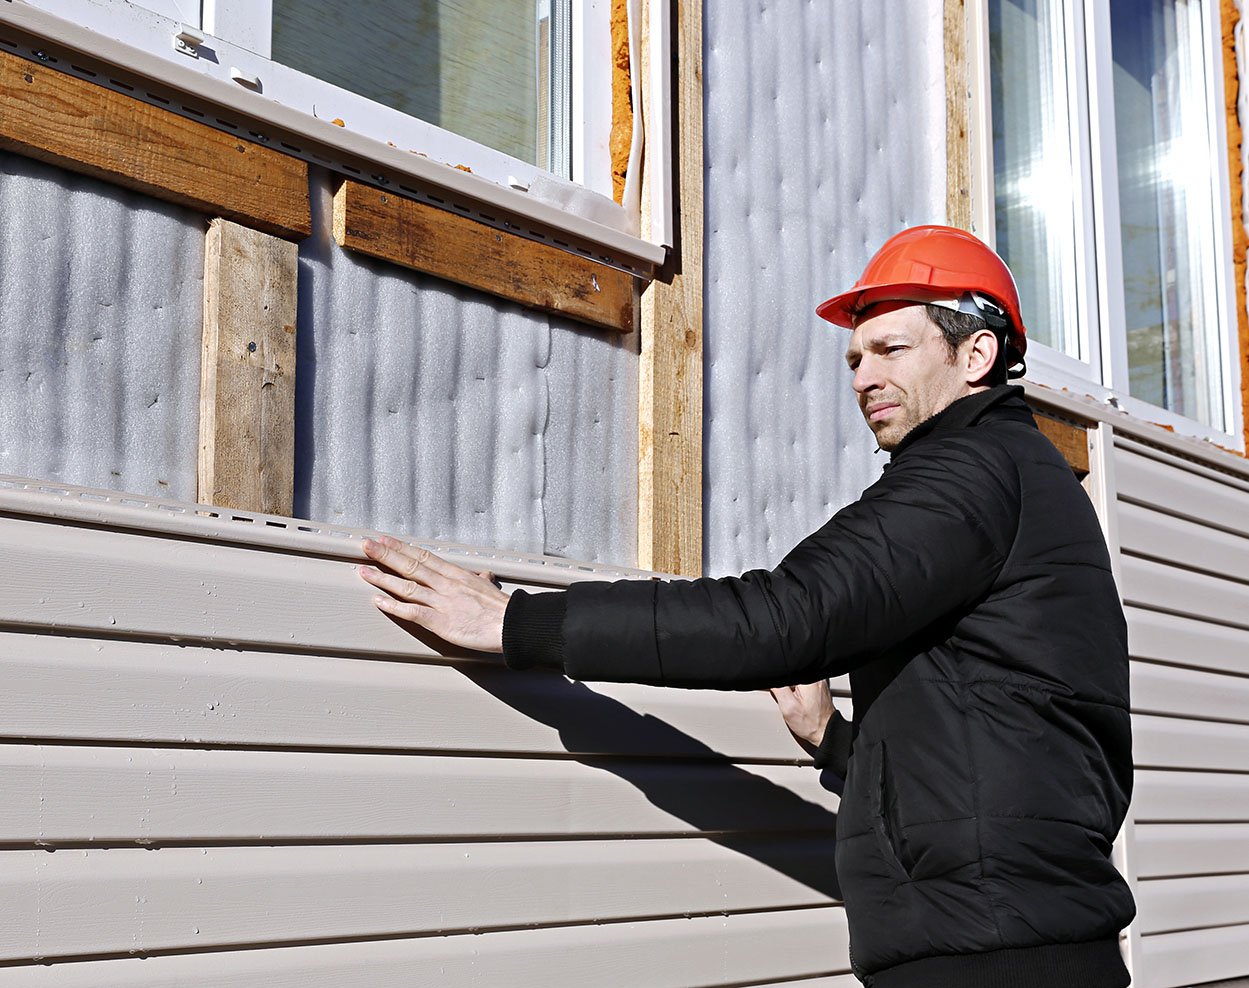
Insulated Siding Installation
This is the core of the installation process. Proper installation techniques are vital to ensure the siding’s longevity and energy efficiency. This includes correct panel alignment, overlap, and fastening.
- Starting the First Course: Begin installing the siding at a corner or designated starting point, ensuring proper alignment and levelness. This is a critical first step, as it sets the foundation for the rest of the installation. Cost: Included in labor costs.
- Installing Subsequent Courses: Install subsequent courses of siding, overlapping panels according to manufacturer’s instructions. Maintain consistent spacing and alignment throughout the installation process. Cost: Included in labor costs.
- Cutting and Fitting Panels: Accurately cut panels to fit around windows, doors, and other architectural features. Precise cutting is crucial for a clean and professional finish. Cost: Included in labor costs.
- Fastening Panels: Securely fasten the panels using appropriate nails or screws, following manufacturer’s recommendations. Over-fastening can damage the panels, while under-fastening can compromise the integrity of the installation. Cost: Included in labor costs.
Finishing and Trim
The final stage involves adding trim and finishing details to complete the installation. This step enhances the aesthetic appeal and protects the edges of the siding from the elements. Proper finishing ensures a professional and long-lasting result.
- Installing J-Channel and Corner Trim: Install J-channel and corner trim to provide a clean and finished look around corners and edges. This step is essential for protecting the edges of the siding from the elements. Cost: $50 – $200 depending on the amount of trim needed.
- Installing Window and Door Trim: Install trim around windows and doors, ensuring a neat and professional appearance. This also helps to protect the areas around these openings from moisture. Cost: $50 – $150 depending on the number of windows and doors.
- Caulking and Sealing: Apply caulk to seal any gaps or cracks around windows, doors, and other openings. This helps to prevent moisture intrusion and improve the overall energy efficiency of the installation. Cost: $20 – $50 for caulking materials.
Potential Cost-Saving Measures
Reducing the overall cost of insulated siding installation requires a strategic approach encompassing material sourcing, labor considerations, and a careful evaluation of DIY capabilities. Several avenues exist to minimize expenses without sacrificing the quality and longevity of the finished product. Careful planning and informed decision-making are crucial in achieving significant savings.
Material Sourcing Strategies
Securing insulated siding materials at competitive prices is paramount. Exploring multiple suppliers, both local and online, allows for price comparison and the identification of potential discounts or bulk purchasing options. Consider purchasing during off-season periods or taking advantage of seasonal sales and promotions offered by manufacturers or distributors. Checking for clearance sales on slightly older stock (ensuring it’s still within warranty) can also yield significant savings. Remember to factor in delivery costs when comparing prices from different suppliers. For example, a supplier offering a slightly higher price per unit might ultimately be cheaper if their delivery fees are significantly lower than a competitor.
DIY Installation Considerations
Undertaking a DIY insulated siding installation can potentially save on labor costs, but it necessitates a realistic assessment of your skills and available time. Improper installation can lead to compromised insulation performance, aesthetic flaws, and even structural damage, ultimately costing more in the long run through repairs or replacements. While YouTube tutorials and online guides can be helpful, they cannot replace professional training and experience. A successful DIY project requires careful planning, meticulous execution, and the acquisition of the right tools. For instance, a homeowner attempting a DIY installation without the proper tools might spend more on rental fees than the savings gained from foregoing professional labor. Weighing the potential savings against the risks of improper installation is crucial.
Professional vs. DIY Cost Comparison
The cost comparison between hiring professional installers and a DIY approach depends on several factors, including the size of the project, the complexity of the installation, and the homeowner’s skillset. For smaller projects with simpler designs, the DIY route might be financially viable, particularly for homeowners with some experience in home improvement. However, larger or more complex projects often justify the expense of professional installation. Professional installers possess the expertise and experience to ensure a high-quality, efficient, and code-compliant installation, minimizing the risk of costly mistakes and future repairs. For example, a homeowner attempting a DIY installation on a large two-story home might find the time commitment and potential for errors outweigh any cost savings, making professional installation the more cost-effective option in the long run.
Visual Representation of Insulated Siding Installation
Installing insulated siding is a multi-stage process with distinct visual changes at each step. Understanding these visual cues can help homeowners monitor the progress and ensure the job is done correctly. The overall appearance will depend heavily on the type of siding chosen and the house’s existing aesthetic.
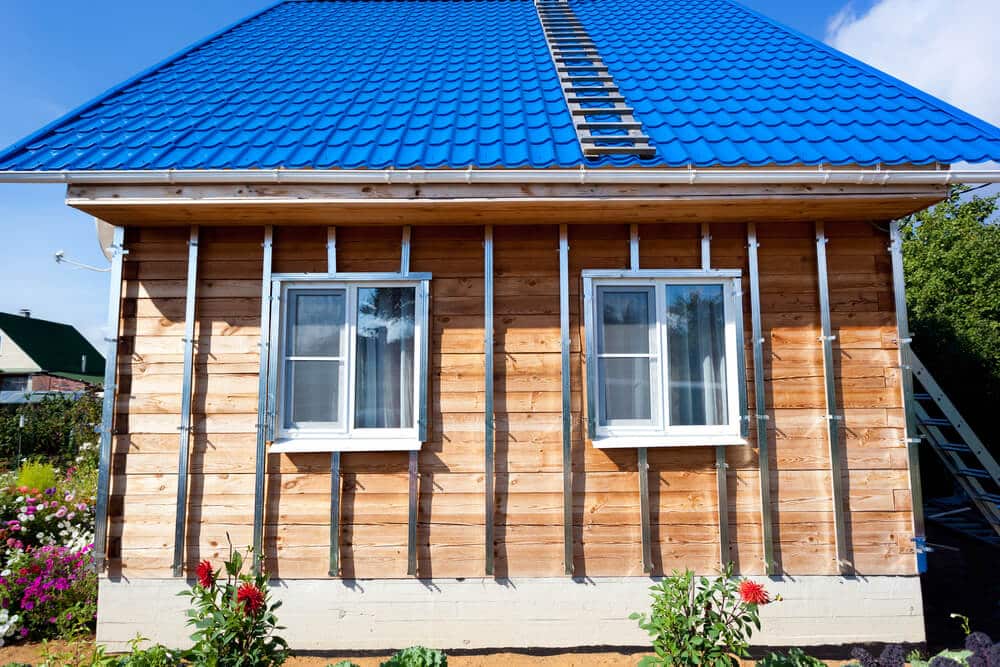
The initial stage reveals the existing exterior wall. This might be bare wood, old siding, brick, or stucco—each presenting a different base texture and color. The existing surface will influence the final look significantly. Next, the preparation phase involves removing old siding, cleaning the surface, and potentially applying weatherproofing materials. This stage usually results in a less visually appealing appearance; a raw, exposed surface is often revealed, showing underlying materials and potential imperfections.
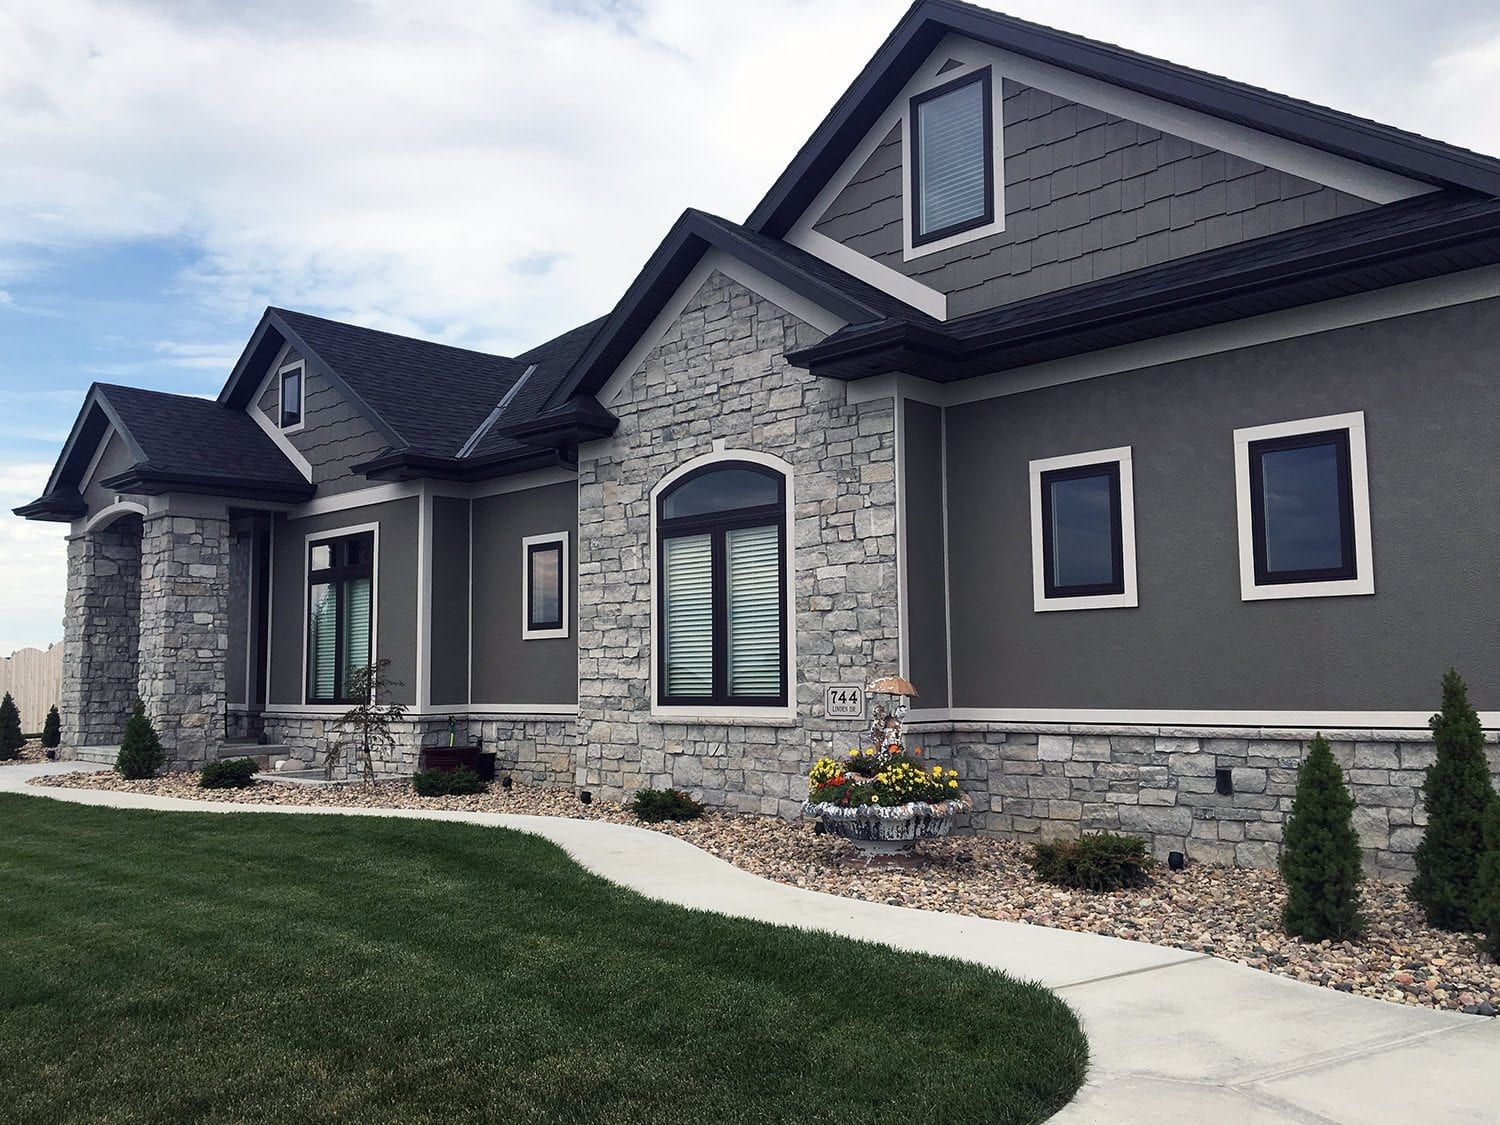
Insulated Siding Material Textures and Colors
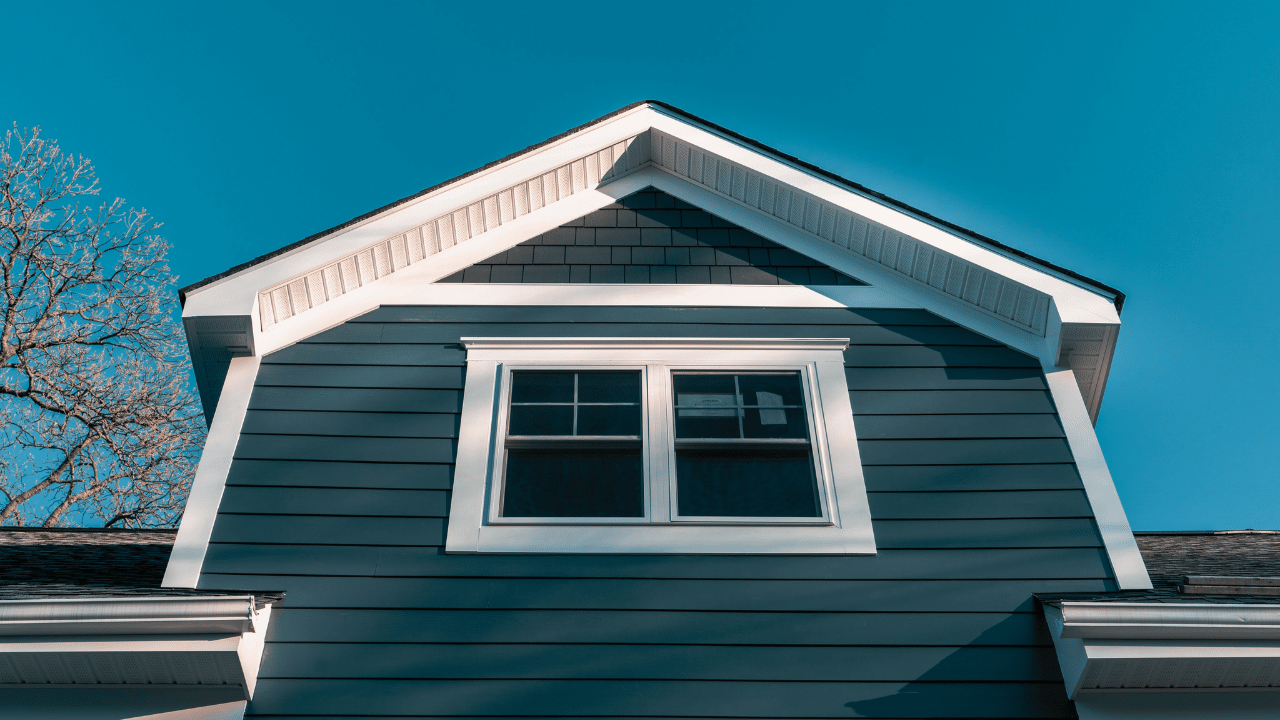
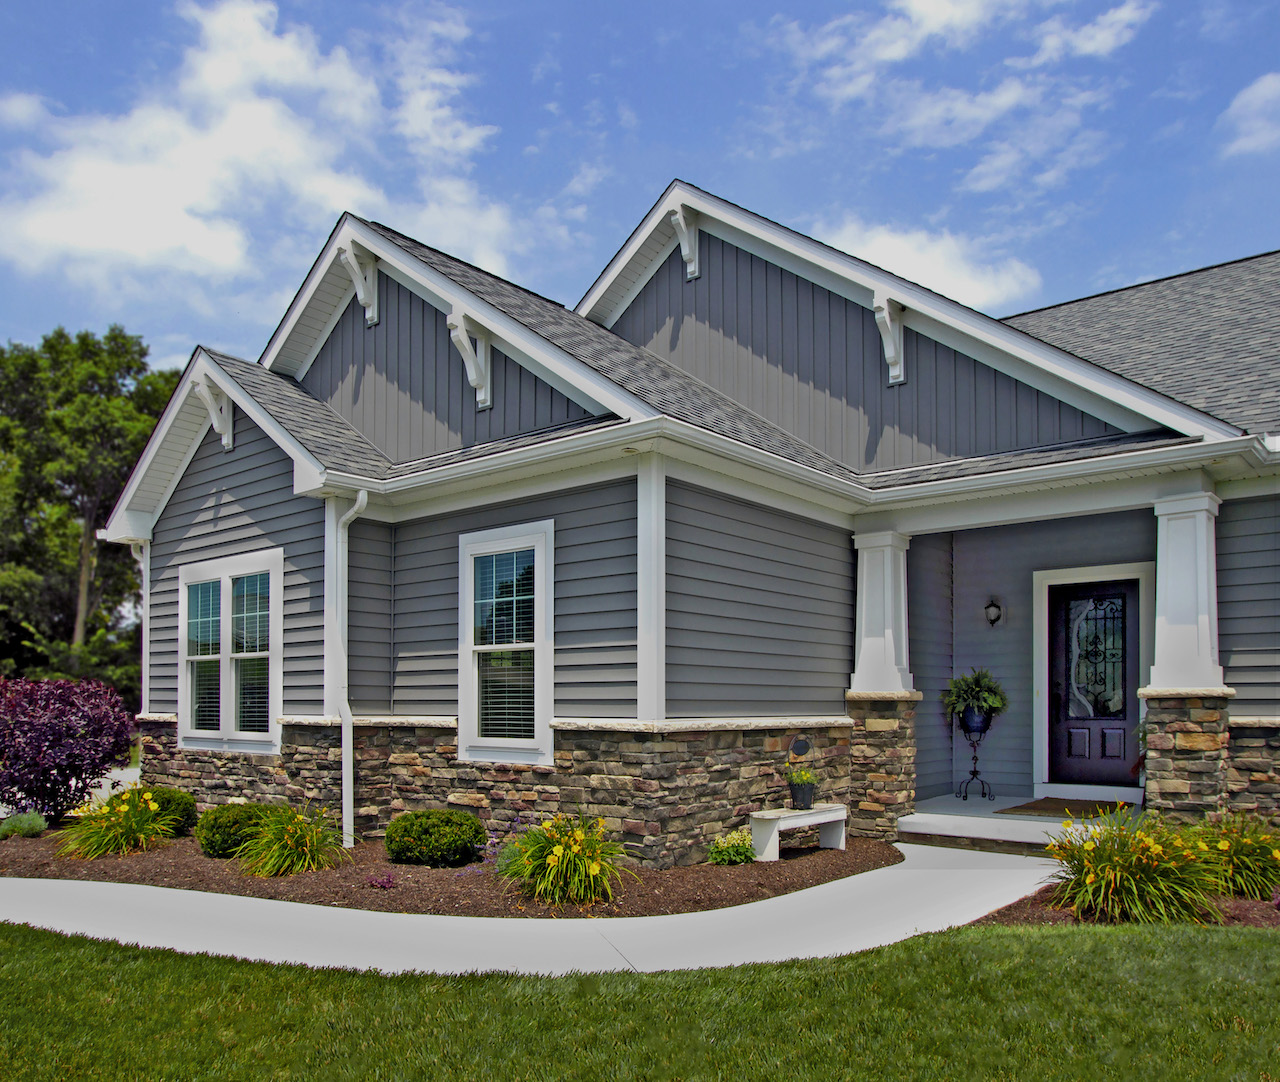
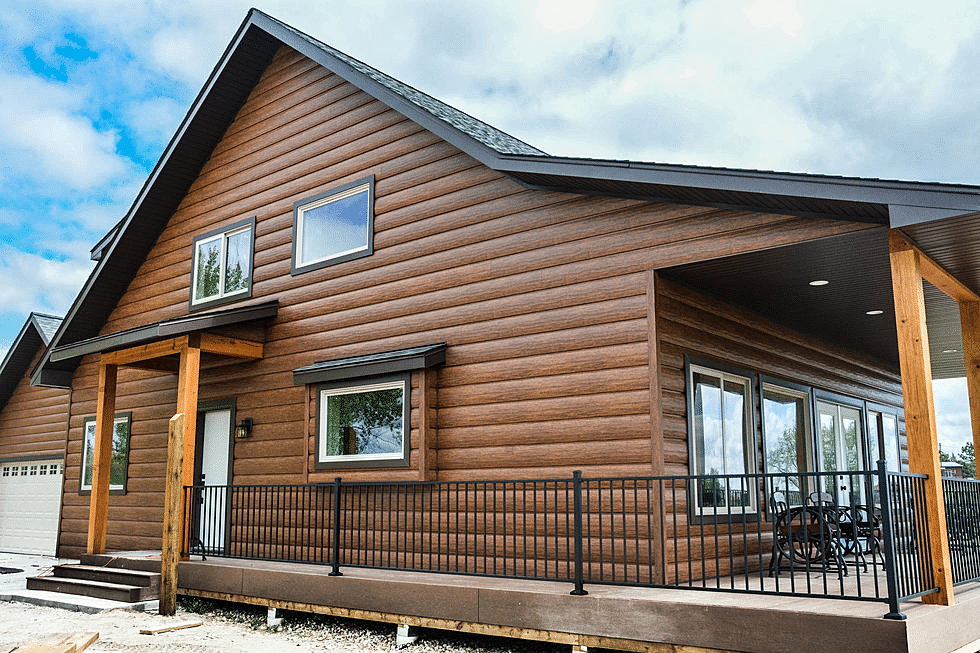
Different insulated siding types offer distinct textures and color palettes. For instance, vinyl siding typically exhibits a smooth or slightly textured surface, offering a wide range of colors, from classic white to deep earth tones and even wood-grain imitations. Fiber cement siding, on the other hand, often possesses a more pronounced texture, mimicking the look of wood clapboard or shingles, and frequently features a slightly rougher, more matte finish. Its color selection tends to be more muted, often focusing on earth tones and subtle variations. Finally, engineered wood siding can achieve a very realistic wood look and feel, often with deep, varied color tones and textures that closely resemble natural wood. The visual differences are substantial, impacting the overall house aesthetic.
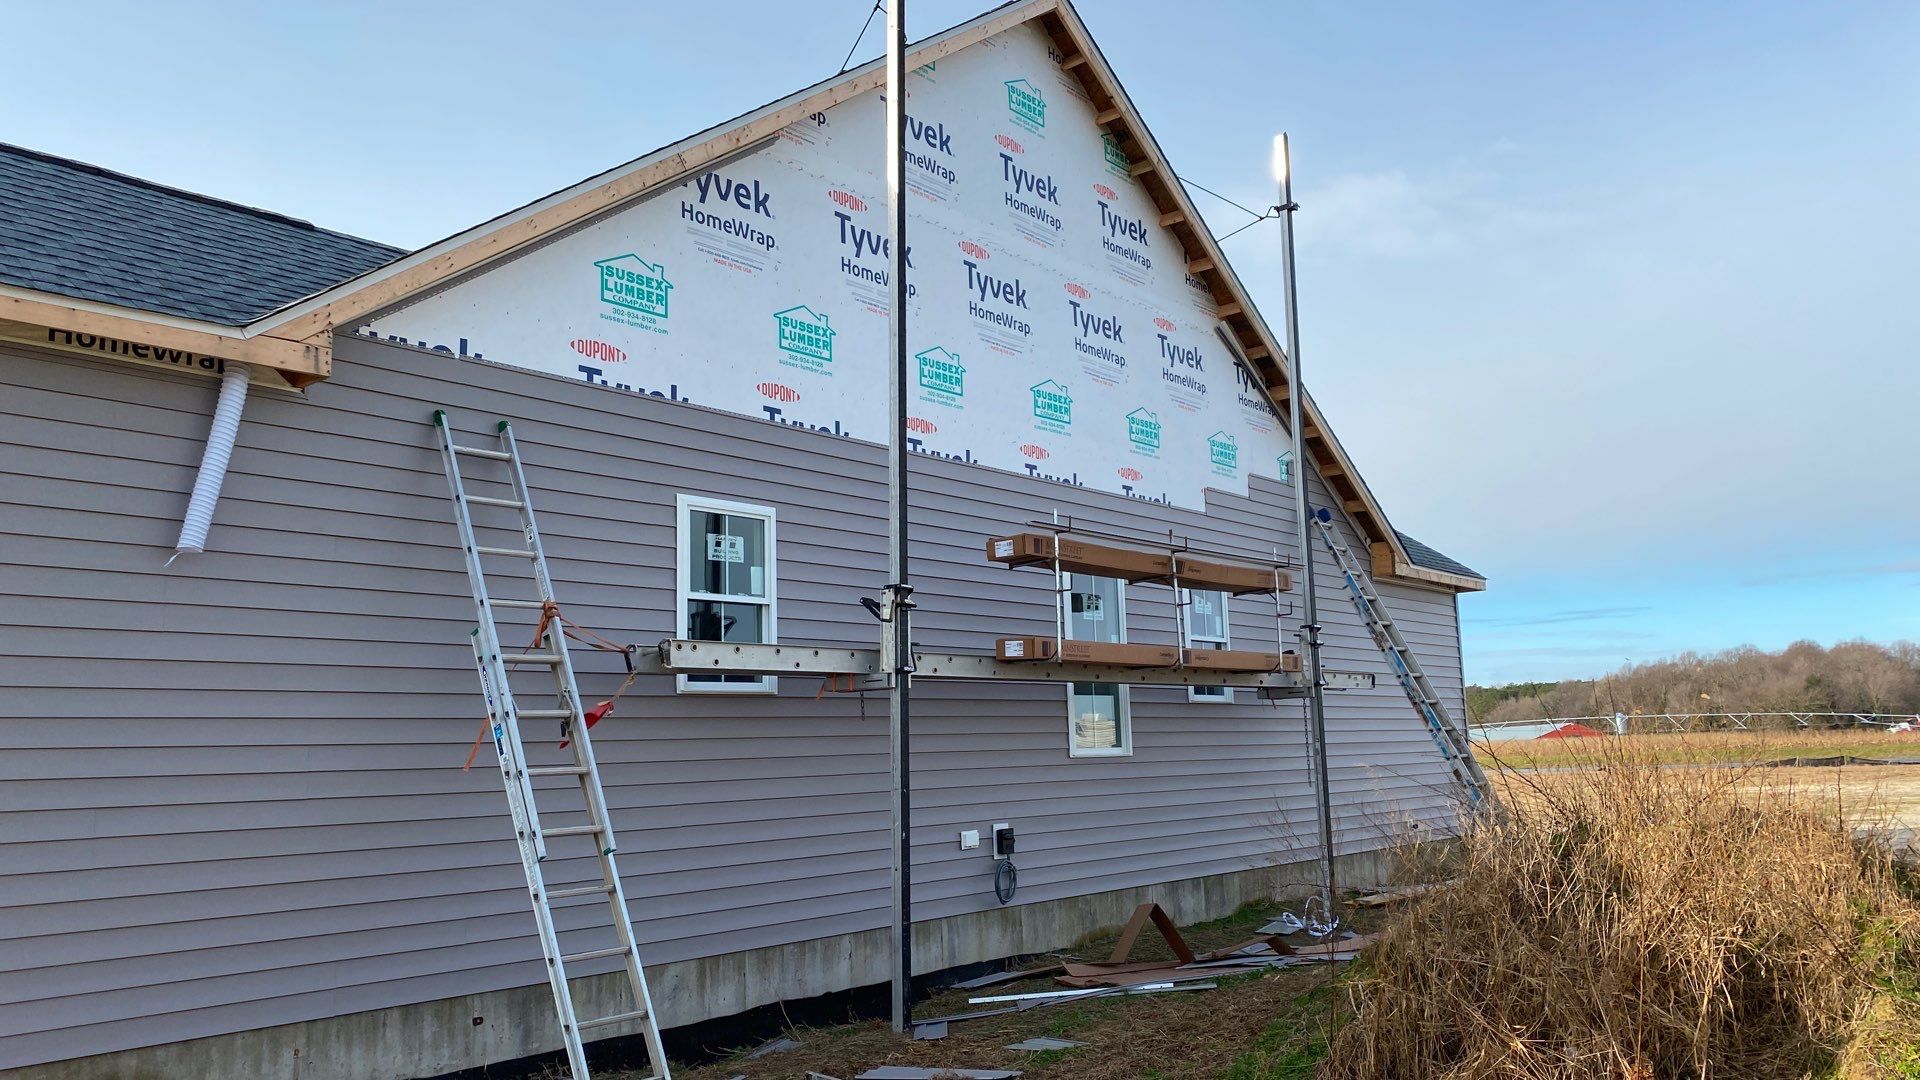
Visual Differences Between Insulated Siding Types During Installation
The installation process itself varies slightly depending on the siding material. Vinyl siding, being relatively lightweight and easy to handle, is often installed more quickly and smoothly. During installation, the panels appear as neatly fitted sections of varying colors, each clicking into place. Fiber cement, being heavier and more rigid, requires more precision and careful handling. Its installation might appear slower and involve more visible fastening points, although the final result often looks more seamless and less prone to visible joints. Engineered wood siding installation shows the rich and varied textures of the individual panels, and the visible wood grain is a prominent feature during and after installation. The difference in visual appearance during installation highlights the unique properties and installation techniques of each material.
Final Thoughts
Ultimately, the cost of insulated siding installation is a multifaceted equation. While initial investment might seem substantial, the long-term benefits—improved energy efficiency, increased home value, and enhanced aesthetics—often outweigh the expenses. By carefully considering the factors outlined in this guide, you can make informed decisions to ensure a successful and cost-effective project that meets your needs and budget. Remember to obtain multiple quotes from reputable contractors and thoroughly research the different siding options available to you.