How to Install Insulated Siding
How to install insulated siding? It’s a question many homeowners ask when considering a home improvement project that boosts energy efficiency and curb appeal. This guide dives into the process, from choosing the right siding material to mastering the installation techniques. We’ll cover various siding types, preparation steps, the installation process itself, handling tricky areas, and finally, finishing touches and maintenance. Get ready to transform your home’s exterior!
Whether you’re a seasoned DIYer or a complete beginner, understanding the nuances of insulated siding installation is key to a successful project. This comprehensive guide will equip you with the knowledge and confidence to tackle this task, saving you money and improving your home’s value. We’ll break down each stage into manageable steps, providing clear instructions and helpful visuals to guide you every step of the way.


Types of Insulated Siding
Choosing the right insulated siding is a crucial decision impacting your home’s energy efficiency, curb appeal, and long-term maintenance. Several materials offer varying levels of performance and aesthetic options. Understanding their strengths and weaknesses is key to making an informed choice.
Insulated Siding Material Comparison
The following table summarizes key characteristics of common insulated siding materials. Remember that actual performance can vary based on installation quality and specific product variations.
| Siding Type | Lifespan (Years) | Cost (per sq ft, approximate) | Insulation R-Value (approximate) | Maintenance |
|---|---|---|---|---|
| Vinyl | 20-40 | $3-$8 | 2-4 | Low; occasional cleaning |
| Fiber Cement | 50+ | $8-$15 | Variable, often requires additional insulation | Moderate; periodic painting and cleaning |
| Foam (e.g., Polyurethane, Polyiso) | 20-30 | $5-$12 | 4-8+ (depending on thickness) | Low; occasional cleaning, potential for UV degradation |
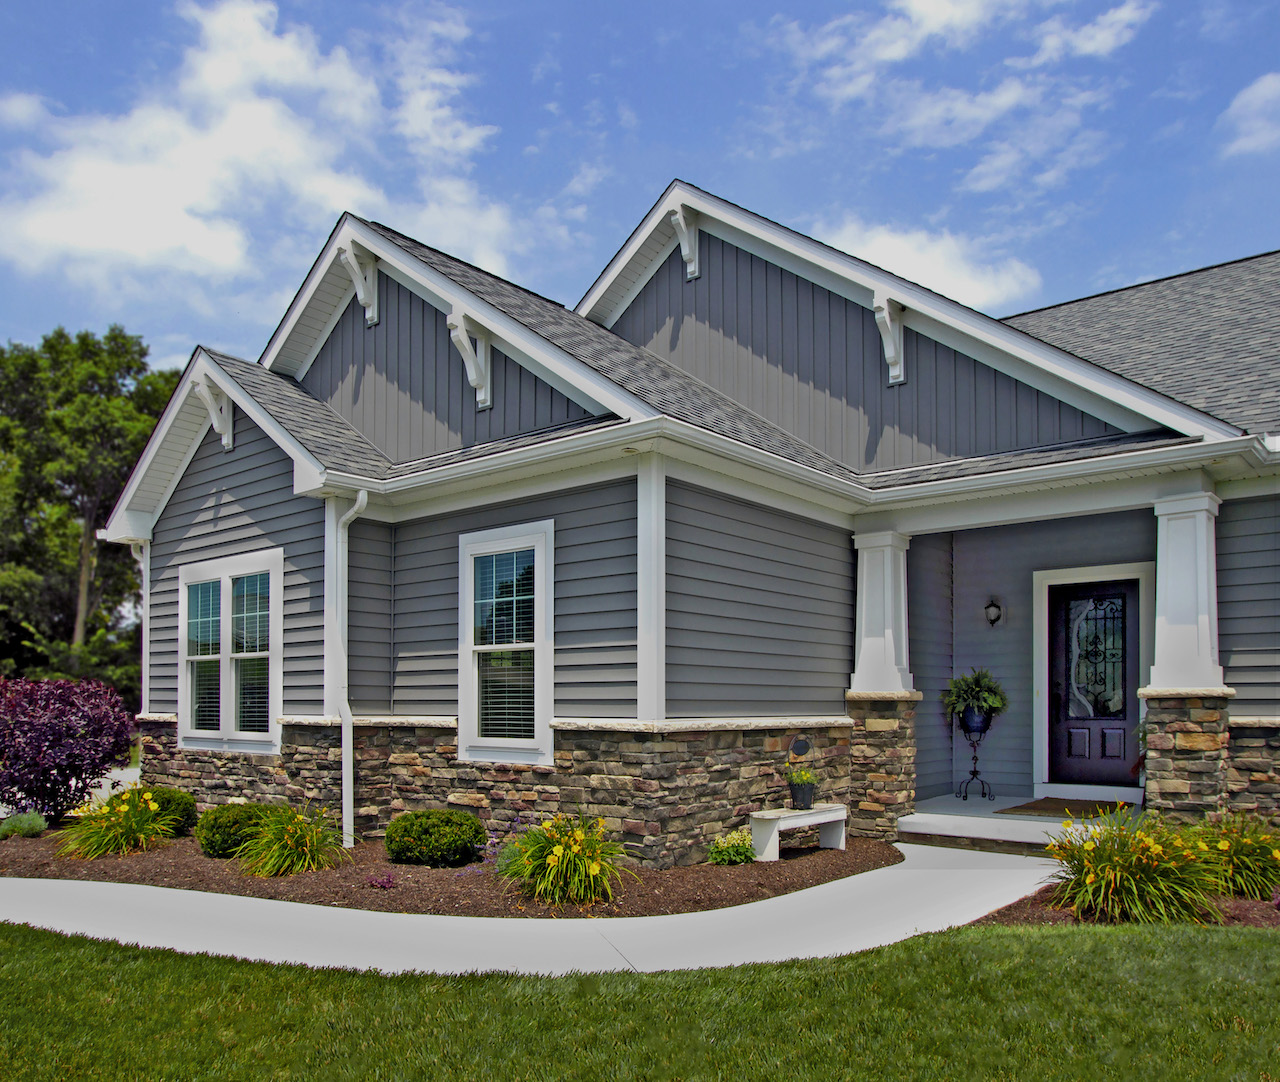
Vinyl Insulated Siding
Vinyl siding offers a balance of affordability and ease of maintenance. Its smooth, relatively uniform surface is available in a wide array of colors and styles, mimicking wood or other materials. However, it’s susceptible to damage from impact and extreme temperatures, and its R-value is relatively low compared to other options. While less expensive upfront, the shorter lifespan might lead to higher long-term costs. In warmer climates, its light color can help reflect sunlight and reduce cooling costs.
Fiber Cement Insulated Siding
Fiber cement siding is known for its durability and longevity. It’s significantly more resistant to damage than vinyl and offers superior fire resistance. The texture can vary greatly, mimicking the look of natural wood grain or smooth stucco, and it can be painted to match any aesthetic preference. However, fiber cement is heavier and more expensive than vinyl, requiring more robust installation. Its inherent R-value is often low, usually necessitating additional insulation behind it to achieve optimal energy efficiency. It’s a good choice for climates with harsh weather conditions.
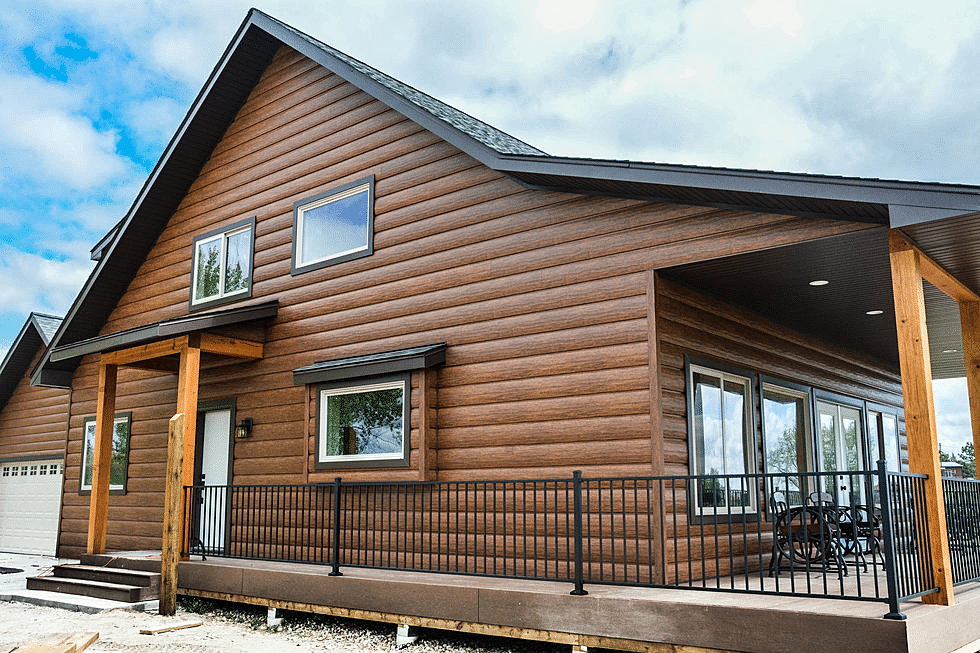
Foam Insulated Siding
Foam-based siding, often incorporating polyurethane or polyiso foam, provides excellent insulation. This translates to significant energy savings, particularly in colder climates. Its lightweight nature makes installation easier, and some types offer a textured finish resembling wood or stone. However, foam siding can be more susceptible to UV degradation and damage from impact, potentially requiring more frequent repairs or replacements than other options. The lifespan is moderate, and cost is generally mid-range. Its visual appeal is less diverse than vinyl or fiber cement.
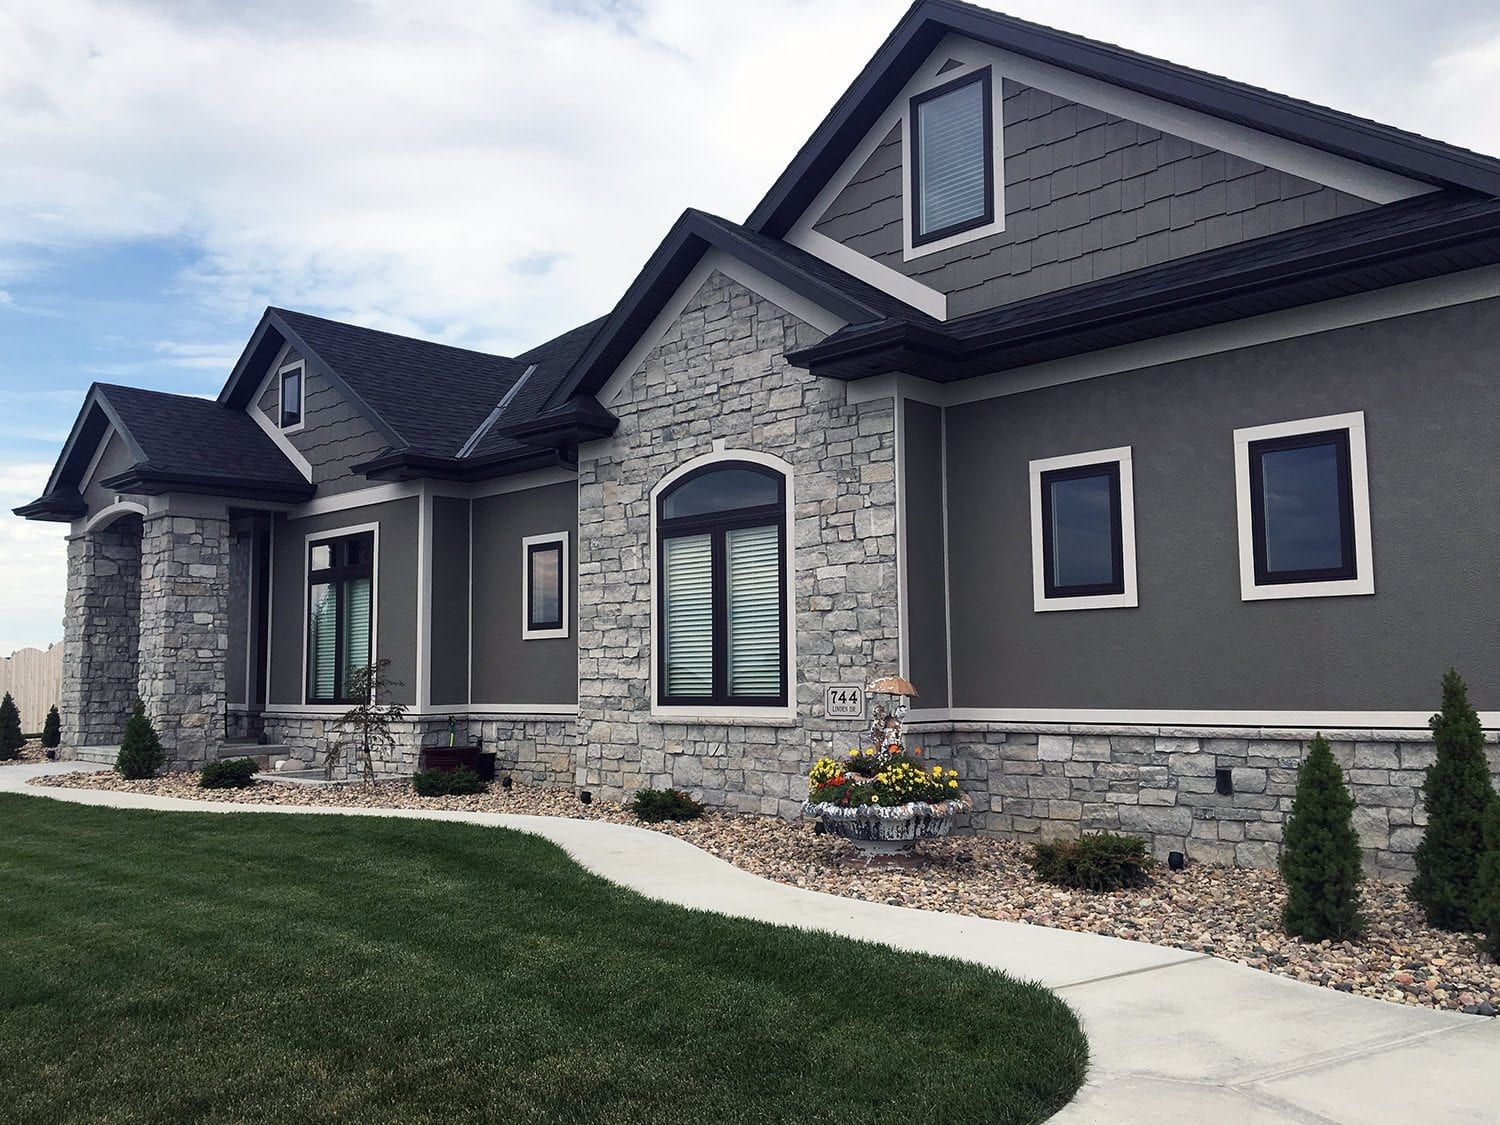
Visual Comparison of Siding Textures and Appearances
Imagine three samples: The vinyl sample is smooth and uniformly colored, perhaps a clean white or a deep, consistent blue. The texture is completely flat. The fiber cement sample, in contrast, might have a subtle wood grain texture, or a more pronounced, almost rough-hewn look, depending on the manufacturer and style. The color might be a deep, rich brown or a muted gray, and the texture offers more visual depth. Finally, the foam sample might have a slightly pebbled or textured surface, possibly designed to mimic stucco or stone. The color would be more limited than the other two, often appearing as a uniform beige or light gray. The foam’s texture is often less refined than fiber cement, but offers a more unique aesthetic than smooth vinyl.
Preparation for Installation
Installing insulated siding is a significant undertaking, but proper preparation significantly impacts the final result and longevity of your siding. Thorough preparation ensures a smooth, professional-looking finish and minimizes the risk of future problems. This section outlines the essential steps and materials required for a successful installation.
Before you even think about touching a siding panel, you need to gather the right tools and materials. Having everything readily available saves time and frustration during the installation process. A well-organized workspace also contributes to a more efficient and safer job.
Necessary Tools and Materials
The tools and materials needed will vary slightly depending on the type of insulated siding you’ve chosen and the condition of your existing wall, but this list covers the essentials for most projects. Having extra of certain consumables, like nails, is always a good idea.
- Measuring tape and pencil
- Level
- Circular saw or hand saw (capable of cutting through the siding material)
- Jigsaw (for intricate cuts around windows and corners)
- Hammer or nail gun
- Safety glasses and work gloves
- Putty knife and caulk
- Ladder (if necessary)
- Insulated siding panels
- J-channel and other trim pieces
- Nails or screws (appropriate for your siding type)
- Underlayment (if required by the siding manufacturer)
- Flashing (for around windows and doors)
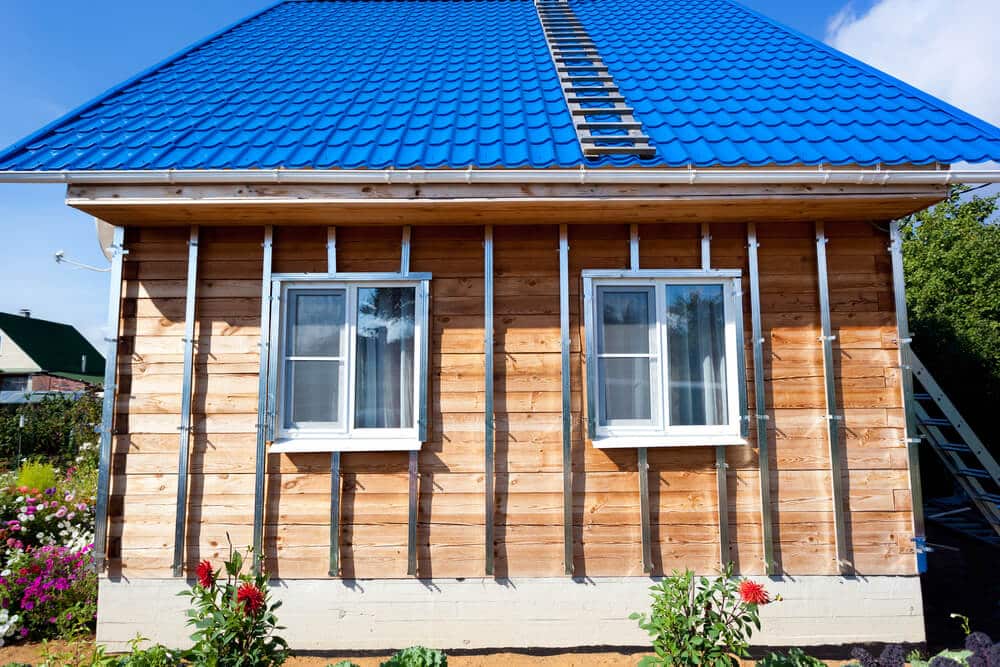
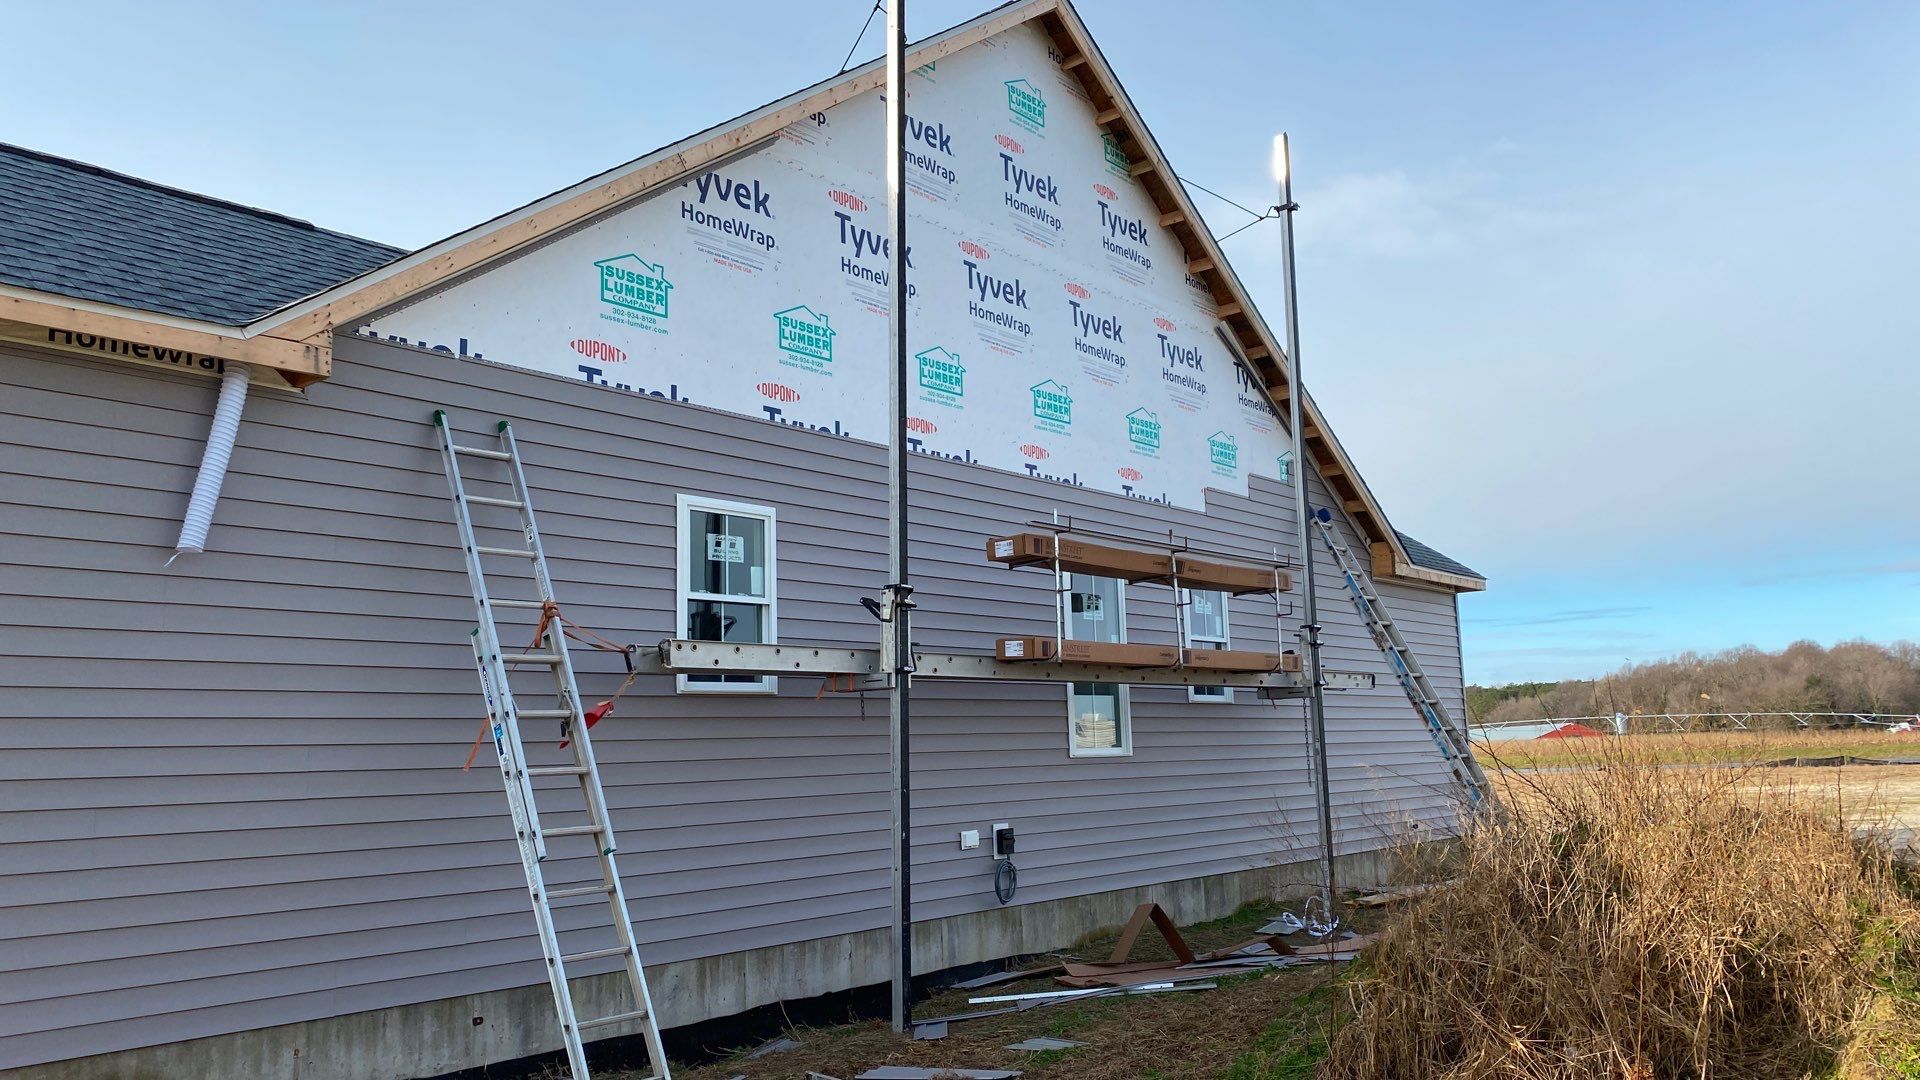
Preparing the Existing Wall Surface
The condition of your existing wall significantly influences the installation process. Proper preparation ensures the new siding adheres correctly and lasts for years to come. This involves several crucial steps to ensure a solid foundation for the new siding.
- Removing Old Siding: Carefully remove any existing siding, paying attention to not damage the underlying sheathing. Use appropriate tools to avoid damaging the wall structure. For example, if you’re removing wood siding, a pry bar is often helpful, but always use caution to avoid damaging the underlying wall.
- Repairing Damaged Areas: Inspect the wall for any damage such as rot, cracks, or loose sheathing. Repair any damaged areas using appropriate materials like wood filler, patching compound, or replacement sheathing. Ensure all repairs are fully cured before installing the new siding.
- Cleaning the Surface: Once repairs are complete, thoroughly clean the wall surface to remove any dirt, debris, loose paint, or other contaminants. A pressure washer can be effective, but be careful not to damage the underlying structure. A wire brush might be necessary for stubborn residue.
Measuring and Cutting Siding Panels
Accurate measuring and cutting are vital for a professional-looking installation. Improper cuts can lead to gaps, misalignment, and an overall unprofessional appearance. Take your time with this step, as it’s crucial for a successful project.
Always measure twice and cut once. Use a sharp blade to ensure clean cuts and minimize splintering. For intricate cuts around windows and doors, a jigsaw is often the best tool. Consider using a speed square to ensure accurate 90-degree cuts. When working with longer panels, ensure proper support to prevent sagging or bending during the cutting process. Pre-drilling pilot holes before fastening can prevent splitting the siding.
Installation Process
Installing insulated siding is a straightforward process, but attention to detail is crucial for a long-lasting, weatherproof finish. Proper preparation, as discussed previously, is key to a successful installation. This section details the step-by-step installation process, focusing on securing the panels and installing corner and trim pieces.
The installation process begins with the first panel and continues in a systematic manner, ensuring proper alignment and overlap. Accurate measurements and careful planning are essential to minimize waste and ensure a professional finish.
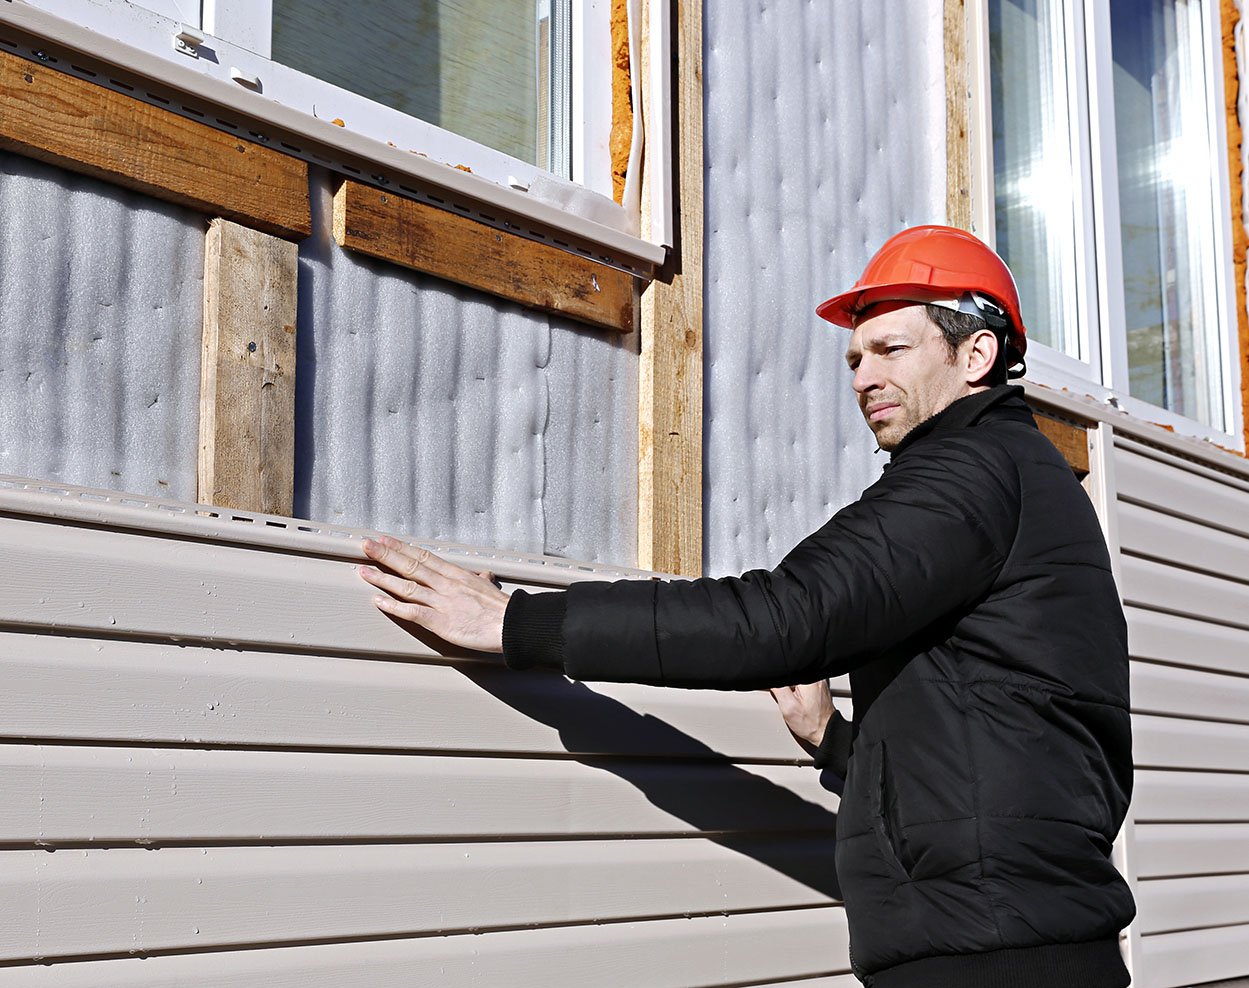
Installing the First Panel
The first panel is the foundation for the entire siding installation. Its proper placement dictates the alignment of all subsequent panels. Begin at a corner or a visually prominent point, ensuring a level and plumb starting point. This is where the importance of accurate pre-installation measurements and preparation becomes apparent. A slight misalignment at the start will magnify as the project progresses.
- Position the first panel against the prepared wall, ensuring it’s flush with the starting point and aligned vertically and horizontally.
- Secure the panel using appropriate fasteners, spacing them according to the manufacturer’s instructions. Over-fastening can damage the siding, while under-fastening can lead to loose panels and potential damage from wind or weather. Fasteners should be driven straight to avoid splitting the siding.
- Check the panel’s alignment again, making any necessary adjustments before moving on to the next panel.
Fastening Siding Panels
Secure fastening is paramount for a durable siding installation. The type and placement of fasteners will depend on the specific siding material and manufacturer’s recommendations. However, some general guidelines apply to most insulated siding installations.
- Use corrosion-resistant fasteners appropriate for the siding material and climate. Stainless steel or galvanized fasteners are commonly used.
- Space fasteners evenly, following the manufacturer’s recommended spacing. This ensures even distribution of stress and prevents warping or buckling.
- Drive fasteners straight into the framing, avoiding angled or off-center placement. Pre-drilling pilot holes can help prevent splitting the siding, particularly with harder materials.
- Avoid over-tightening fasteners, as this can damage the siding. The fasteners should be snug but not excessively tight.
Installing Corner and Trim Pieces
Corner and trim pieces provide a neat, finished look and protect vulnerable edges of the siding. Proper installation is crucial for both aesthetics and weather protection. These pieces should be installed before or concurrently with the main siding panels, depending on the specific design and manufacturer’s instructions.
Diagram 1: Corner Piece Installation. Imagine a corner formed by two intersecting walls. The corner piece is a specially designed L-shaped piece that fits snugly into this corner. The longer leg of the ‘L’ is placed against one wall, and the shorter leg against the other. Fasteners are driven through the corner piece into both walls. The overlap between the corner piece and siding panels should be consistent and sealed appropriately to prevent water intrusion.
Diagram 2: J-Channel Installation. The J-channel is used to finish the edges of the siding, such as around windows or doors. It creates a clean, finished look and protects the edges of the siding. The J-channel is installed first, and the siding is then slipped into the channel. Fasteners secure the J-channel to the framing.
Remember to always consult the manufacturer’s instructions for specific details on fastener placement and installation techniques. Improper installation can void warranties and compromise the performance of the siding.
Dealing with Obstacles
Installing insulated siding isn’t always a straightforward process. Obstacles like windows, doors, and uneven walls require careful planning and execution to ensure a professional-looking and properly insulated finish. This section outlines strategies for overcoming these common challenges.
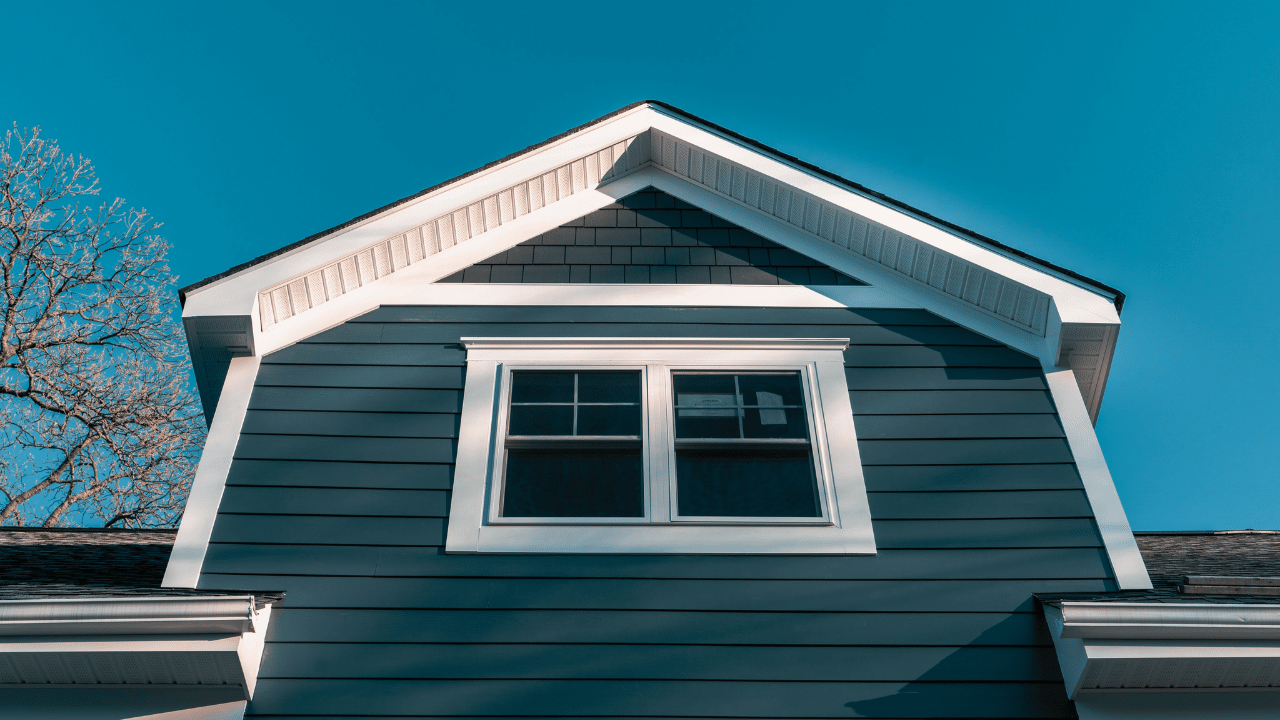
Siding Installation Around Windows and Doors
Proper installation around windows and doors is crucial for preventing air leaks and maintaining the aesthetic appeal of your siding. The process generally involves using trim pieces specifically designed to create a seamless transition between the siding and the window or door frame. These trim pieces are usually cut to fit precisely around the window or door, ensuring a snug fit. Flashing, a thin, waterproof material, should be installed behind the trim to further prevent water intrusion.
Imagine a window surrounded by existing brickwork. First, you’d measure and cut J-channel to fit snugly around the window frame. This J-channel acts as a starting point for the siding. Then, you’d install the flashing, overlapping it slightly onto the window frame and tucked under the J-channel to create a waterproof barrier. Finally, the insulated siding panels would be installed, starting from the J-channel and working outwards. The final step is to install the corner trim or other decorative pieces to finish the look and provide a clean, professional edge. The visual representation would show a cross-section view of the window, highlighting the layering of flashing, J-channel, and siding panels. The various pieces would be labeled for clarity.
Managing Uneven Wall Surfaces or Complex Architectural Features
Uneven walls or intricate architectural details present unique challenges. For minor imperfections, you can often compensate by carefully adjusting the placement of the siding panels. For more significant irregularities, shims can be used to create a level surface for the siding to rest on. Remember to always measure twice and cut once. In cases of very uneven surfaces, you may need to consider adding furring strips to create a consistent plane before installing the siding. Complex features like bay windows or dormers may require custom-cut panels and additional trim pieces to ensure a proper fit. In such cases, pre-planning and careful measurements are essential. Accurate planning and careful measurements are essential for these complex installations.
Common Installation Mistakes and Their Avoidance
Several common mistakes can compromise the effectiveness and longevity of your insulated siding installation. One common error is improper flashing installation, leading to water damage. Always ensure proper overlapping and sealing of flashing materials. Another mistake is neglecting to account for expansion and contraction. Insulated siding expands and contracts with temperature changes; failing to account for this can lead to buckling or cracking. Leaving gaps between panels is another issue, potentially leading to air leaks and energy loss. Finally, using the wrong type of fasteners or improper fastening techniques can damage the siding or compromise its structural integrity. To avoid these issues, always use appropriate fasteners, follow the manufacturer’s instructions carefully, and ensure all panels are securely fastened. Regularly check your work throughout the installation process.
Finishing Touches and Maintenance
Proper sealing and regular maintenance are crucial for extending the lifespan and preserving the aesthetic appeal of your newly installed insulated siding. Neglecting these steps can lead to costly repairs down the line, including water damage and structural issues. This section details the final steps of installation and provides guidance on long-term care.
Sealing and Caulking
Effective sealing prevents water intrusion, a major cause of damage to any exterior cladding. All gaps and seams between siding panels, around windows and doors, and at the base of the siding should be carefully sealed with high-quality exterior-grade caulk. Choose a caulk that is compatible with your siding material and designed to withstand temperature fluctuations and exposure to the elements. Before applying caulk, ensure the surfaces are clean and dry. Apply a thin, even bead of caulk, smoothing it with a wet finger or caulking tool for a neat, professional finish. Allow the caulk to fully cure according to the manufacturer’s instructions before exposing it to rain or extreme temperatures. Pay particular attention to areas prone to water accumulation, such as corners and joints. Regular inspection of these areas will allow for quick identification and repair of any cracks or gaps that might develop over time.
Cleaning and Maintenance
Regular cleaning helps maintain the appearance and prolongs the life of your insulated siding. A simple solution of mild detergent and water, applied with a soft-bristled brush or sponge, is usually sufficient for removing dirt, dust, and cobwebs. Rinse thoroughly with clean water to prevent soap residue from building up. For tougher stains, consider using a pressure washer, but maintain a safe distance to avoid damaging the siding. Always follow the manufacturer’s cleaning recommendations, as some siding materials may require specific cleaning agents or techniques. Avoid abrasive cleaners or harsh chemicals, which can scratch or damage the surface. Annual cleaning, ideally in the spring or fall, is recommended to prevent the buildup of dirt and grime. For areas exposed to heavy soiling, more frequent cleaning may be necessary.
Addressing Minor Damage
Despite careful installation and maintenance, minor scratches or dents can occasionally occur. For small scratches, a touch-up paint that matches your siding color can often effectively conceal the damage. Larger dents or more significant damage may require professional repair or replacement of the affected panels. It’s important to address any damage promptly to prevent further deterioration and maintain the structural integrity of the siding. For instance, a small dent may initially seem insignificant, but if left unaddressed, it could create a weak point for water penetration, potentially leading to more extensive damage later. Regular inspections, at least twice a year, will help identify and address minor issues before they escalate into more serious problems.
Closing Notes
Installing insulated siding is a rewarding project that significantly enhances your home’s energy efficiency and aesthetic appeal. By following the steps outlined in this guide, from careful material selection and meticulous preparation to precise installation and proper maintenance, you can achieve a professional-looking finish that will stand the test of time. Remember, attention to detail is crucial for a long-lasting, beautiful, and energy-efficient result. Now go forth and upgrade your home’s exterior!